Making a Geoboard
What is a Geoboard?
Well, to paraphrase the Wikipedia entry, A Geoboard is a tool often used to explore basic concepts in geometry such as perimeter, area or the characteristics of triangles and other shapes. It’s generally a board with nails partly driven in, and students are encouraged to place rubber bands around the nails to model various geometric concepts or to solve other mathematical puzzles.
Bit of trivia from the same entry: Geoboards were invented and popularised by Egyptian mathematician Caleb Gattegno in the 1950s.
Different Types of Geoboards
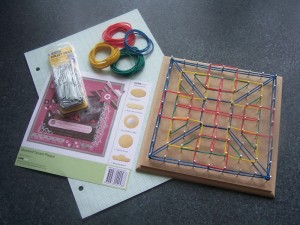
Materials
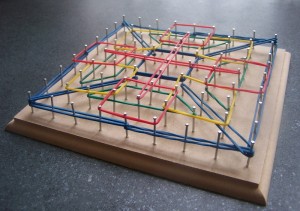
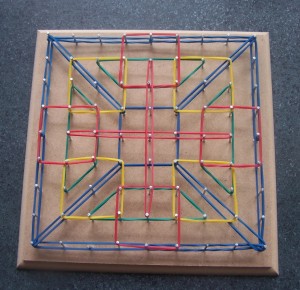
The end result will be a 9×9 nail board that’s pretty utilitarian and it didn’t take nearly as long as I thought it would.

I’ve mentioned brand names and the stores I purchased them from in the hope this helps someone in New Zealand.
- 1. Taking the sheet of graph paper, fold it along two perpendicular sides along one the strong lines so you end up with a square folded corner. Then take the square corner made, place it over one of the front surface corners of the wooden plaque and tape it in place. The end result is the top surface of the plaque is covered in graph paper so that the strong lines of the graph paper line up with all the edges and the graph paper doesn’t move around (though if it’s not taut it isn’t a problem).
- 2. You’re aiming for a 9 nail by 9 nail square and this is achieved by placing nails 2cm apart from each other and having a 2cm border around the outer edge of the plaque. It’s easiest to start hammering nails in from the center outwards and moving from left-to-right if the hammer is in your right hand. I made “concentric” squares starting from the nail in the centre, spinning the board as I finished nailing each side of the current square. Also, it’s worthwhile mentioning that standing to hammer results in straighter nails.
I gauged the height of the nail based on hammering the first two in and then eyeballing them with a third nail held against the side of the board touching the table, and then slowly hammering them further in til they were firmly placed but not poking through the bottom of the plaque. Despite my concern that I would do so anyway, it didn’t happen and I feel confident in saying if I didn’t screw that up – you certainly won’t! :)
- 3. Remove the tape holding down the graph paper and ease it up the nails and then rip it off. There’ll be a few fragments of graph paper left.
- 4. Voilà – your Geoboard is complete! Get out the rubberbands and have at it :)

There are a ton of activities, ideas and lesson plans available on the web so I won’t be elaborating on how to fully utilise your new Geoboard.
I have a circular plaque ready for making a Circular Geoboard which should be an interesting adventure. And for an extra challenge I could be convinced to make an Isometric Geoboard.
Thanks to Mama Jenn via The Crafty Crow for the inspiration to make my own version. :)
And if neither my version, or Mama Jenn‘s, suits your needs – there are plenty of tutorials on making Geoboards out there. Not to mention pre-made plastic Geoboards generally seem quite inexpensive.


November 23rd, 2009 at 3:51 am
i want to know about how to make a CIRCULAR GEOBOARD and also need information about it
November 2nd, 2012 at 2:44 pm
my daughter josel marcano who is in std 3 has to make a geobord for her end of term project with my guidance,reading your instructions have been quiet helpful to me,i will surely make this an even more enjoyable experience for her.WISH ME LUCK ,I HOPE THAT SHE HAS THE BEST ONE
P.S WILL LET YOU KNOW HOW IT GOES……..
November 2nd, 2012 at 2:46 pm
THANKS FOR HELPING ME UNDERSTAND THE GEOBOARD CONCEPT,THIS WILL SURE HELP WITH MY DAUGHTERS’ CLASS PROJECT
September 3rd, 2014 at 12:47 pm
[…] […]