101 in 1001 – February 2008 Update

Well I think we can successfully say that I’m not doing great at this but on the other hand with over 900 days to go I’m not doing as badly as I thought. I come across as being really negative in assessing the tasks below but I’m not that cut up about it – just giving myself a stern talking to. :)

Before this update:

101 in 1001
Start: 01 Jan 2008
Finish: 28 Sep 2010
Days Left: 947
Completed: 1/101

1. assemble a comprehensive family tree
Whilst I haven’t start this project yet, family have kindly loaned me several boxes of accumulated material (genealogy was one of the things we did as a family growing up) for a while so I have no excuses for getting stuck in.

3. bake something new each month 2/33
The birthday cake and cupcakes I made for my daughter’s birthday (with her assistance) were both new recipes for me. I didn’t care for the chocolate cake much as I believe a chocolate cake should contain chocolate rather than cocoa. I didn’t actually eat any cupcakes so I wouldn’t know much about how those turned out. The girls had more fun decorating them than anything I’d say. Does Icing count as baking? I avoid making icings like the plague as I can never get the proper consistency. I really wasn’t happy with the consistency of the icing on the cupcakes, though the chocolate icing on the cake came out okay.

9. buy a photo printer – Completed
As of Tuesday, this became a reality when we got a new Epson Stylus CX9300F. It was inexpensive and we needed to replace our scanner which was slowly eating away at my sanity with it’s ability to lock up and scream to be unlocked.

12. collect and grow my own seeds
Collected some Calendula seeds mid-january and today harvested Kowhai seeds which should be a nice challenge to germinate. Once the Marigold flowers die back I’ll be grabbing some of those too. This has been a good task as it’s made me open my eyes more to the entire lifecycle of growth in the garden.

16. do the blog 365
Yeah – this would have to be my biggest failure so far. Even counting the Project 365 posts, the total so far is 29 posts and 4 drafts (including this one – making a grand total of 33 if I get off my arse and finish off the other 3 drafts. Seeing as we’re at day 54 that’s pretty bad. Even worse if you think that counting the Project 365 posts is cheating.

19. do project 365 – In Progress

Well I’ve only put 21 days worth up on this site and I think I have another 7 days worth on the camera. So we’re at Day 54 and I only have a total of 28 days. That’s a bit of a difference. I haven’t been taking photos much recently at all and admittedly some days I’ve only taken photos where my daughter is the subject and I’m still a bit up in the air about posting photos of her – more from the she doesn’t get much say in the matter if I do perspective than anything else. I’m going to persevere with this.

30. frame favourite photos – In Progress
I framed a photo of our cat that I took late last year and it’s really brought out that corner of the room.

33. get digital photos printed and framed or albumed – In Progress
Well now we have a photo printer this should be much less work. Now I just need a frame replicator and I’m set. All I’ve done is a test print of a photo we got printed recently at the pharmacy. The tone from the printer isn’t as colour enhanced and I think is more true to life. I suspect the machine at the pharmacy does the equivalent of an auto-colour. I framed a photo of our cat that I took late last year and it’s really brought out that corner of the room. I’m noticing a bit of duplication in these tasks.

68. learn to recognise the southern constellations – In Progress
Well, I’ve gone through our collection of books and discovered we have one that’ll do as a nice primer to start with. Next step – refresher on the Southern Cross and how to find South – I’ve become a bit hazy on the concept. “3 and a half lengths of something, and middle of the pointer sisters? Then those two lines come together and that point drops down to the horizon?”.

73. make weekly contact with family and friends 7/143
(should be 8/143)
I got a bit overwhelmed around daughter’s birthday with a bunch of stuff and I’m afraid making contact with family and friends suffered as a result. I want to get better at this.

82. read 100 books (romances and rereads not included) 2/100
(should be 5/100)
I’m surprised at how little I’m managing to read and the discovery that romances are easier for me to wind down at the end of a day for sleep than other fiction – irregardless of the enjoyment factor. Perhaps this is just a habit I’ve trained myself in but I can guarantee a restless night’s sleep if I neglect to wind down before bed and that includes what I would consider normal reading material. So I figure I have two options, either carve out part of my day to get some proper reading happening, or retrain my mind to accept better fiction or recreational non-fiction as wind down material.
So far I’ve completed:
Mort by Terry Pratchett
Sourcery by Terry Pratchett

83. record sam’s daily activities 43/1001
(should be 54/1001)
This is something that is really hard to do if I let it slide. I can only vaguely recall details about something that happened 3 days – so I have to keep on top of this! On the other hand, this has been a wonderful task and I’m motivated to continue. This kind of exercise shows the flaw in trying to do something for every day of the 1001 days – the lack of a margin for error means you effectively fail the first time you miss a day.

91. solve the rubik’s cube – In Progress

Well this has certainly been an adventure. Father Christmas gave husband an imitation Rubik’s Cube a couple of years back and it’d been at the back of a drawer untouched so I snaffled it. And just the past week a friend returned a guide to solving the Rubik’s cube they’d borrowed. So I got out the cube and had a stab at it, and managed to almost break it – it didn’t come completely apart but enough to make me shove it back in the drawer and call it quits for the night. I pulled it out again tonight and investigated the damage and then had fun pulling it to bits to fix it. Required a screwdriver and some glue but it should be good as new once the glue sets.

After this update:

101 in 1001
Start: 01 Jan 2008
Finish: 28 Sep 2010
Days Left: 947
Technically Should Have Completed: 5/101
Completed: 2/101

Well I think we can say that I’ve fallen behind, it’s early days yet and with a bit of consistentcy I should be able to catch up.
The plan is to update on the 1st of March with another update, and a list of things to work on for the month.
For the remaining 6 days, I’ll be working on the following:
16. do the blog 365
19. do project 365
30. frame favourite photos
33. get digital photos printed and framed or albumed
68. learn to recognise the southern constellations
73. make weekly contact with family and friends
75. memorise origami designs
82. read 100 books (romances and rereads not included)
Complete reading Wyrd Sisters by Terry Pratchett (which I’m struggling with because I’ve seen a comic adaption that had a script incredibly close to the book) and get stuck into the next book in the Discworld series, Pyramids.
83. record sam’s daily activities
90. send monthly handwritten letters
91. solve the rubik’s cube
Also, get the drafts published and daily photos up.
Daily Photo – Day 39

20080208115256.jpg

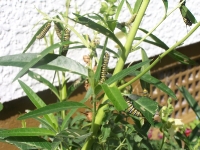
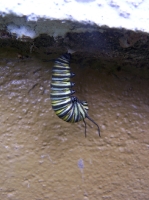
They’ve abandoned the plants they’ve stripped (except for the bits I isolated using plastic bags and twisty ties) and resorted to moving into chrysalis mode on the house. We’ve spotted two chrysalis’s and two caterpillars hanging around.


Wedding Goodies

This is a post that has been on the To Do List since 2003 – not long after we got married in fact. So here we are 5 years later and I’ve finally got around to taking some photos.

Going sequentially through the wedding process is probably the best way to tackle this so firstly:

The Invitations

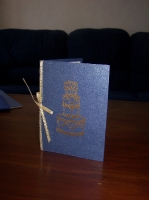
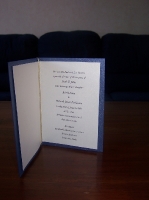
20080208130611.jpg20080208130606.jpg

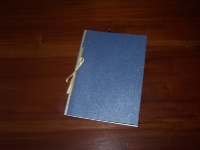
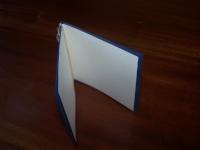
The invite is A6 in size made from a stiff dark blue card with a glittery effect. The decoration on the front was a rubber stamp of a wedding cake that we embossed using clear ink and gold embossing powder. The embossing powder was melted by holding the card over the toaster – two shots would do a card :P
The inside is a creamy pearlised paper with a shimmer cut down in size so the cover acts as a border. The inner sheet was affixed to the outer card by running a glue stick down the spine of the inner only on the back. The ribbon acted as a bit of reinforcing so it was tied quite tightly. That bow wasn’t actually tied by me – I can tell cause my bows were quite compact and were neater – my inner perfectionist coming through.

20080208130629.jpg

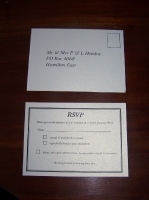
We included with the invitation an A6 RSVP card, pre-stamped which was a godsend. It was made from a heavier weight card in the same style as the creamy paper mentioned earlier.

20080208130649.jpg

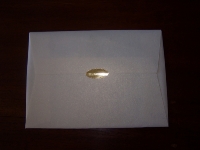
The envelope, as you can see is made from the same creamy paper mentioned earlier and I designed it using a deconstructed envelope. It’s a nice design as it only required a small amount of cutting from A4 size. No trimming down to size required and it didn’t take long to do. The envelopes were constructed around the Invite and RSVP using stick glue and reinforcing using the seal shown. The invites stood up well in the mail.

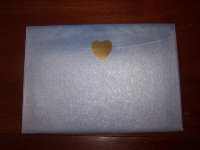
The next step was sending out Information Packs to people who’d requested them on their RSVPs. I don’t have a photo of the insides unfortunately, as the last paper copy is sealed in the envelope shown below! We included a Welcome page expressing our delight that they were coming and also mentioning tidbits of info relating to the wedding, an overview of Palmerston North with ideas for things to do if they arrived a day or so early or stayed later, a hand-drawn Map showing the way to get from the centre of Palmerston North to the Church and the reception, and also showed where the Motel most out of towners stayed at was. And finally a page on the Motel and it’s amenities. So not much, but the feedback was great. These were made in the ubitquitous creamy paper again and were A6 in size.
20080208130659.jpg

We opted for sending them out in some premade envelopes in Metallic Blue (not quite the same as the Blue card used elsewhere but close enough to not be obvious.

Ceremony Booklet

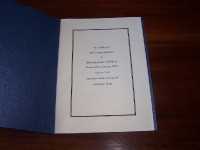
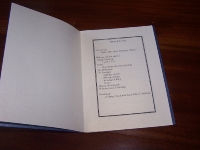
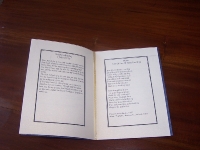
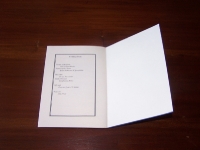
We provided each of the guests with a Ceremony Booklet when they arrived at the church. It was A5 in size made from the blue card with creamy pages and tied with the ribbon as an anchor. I can’t remember doing this but looking at them we must have used the glue trick as well. The cream pages weren’t cut down to size to save time but each page had a border on it which helped hide that. I guess making sure every page was straight also helped a bit :P.
20080208130811.jpg

The first page reminded you why you were there, the other side was blank, then the facing page had the details of the ceremony (ie How long you would be sitting on a wooden pew for :P ), the other side of that page had the scripture reading (so you could see it was quite short), then the words to the hymn, and then on the back of the hymn page was the names of the wedding party etc. Followed by a blank page.
20080208130821.jpg20080208130828.jpg20080208130837.jpg20080208130805.jpg

The Reception

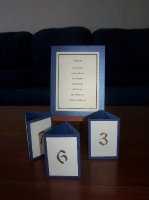
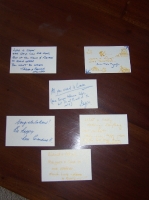
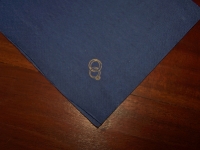
Coming into the marquee there was a set of mini easels on a table each with a printed seating table list. And on each table we had a matching number. These were quite fun to make. We used a embossing ink pen and a stencil for the table numbers and embossed it using the gold embossing powder and the toaster :P. The cream card they were done on was then mounted onto three-sided … things. Well you can see for yourself in the photos. Then at each place we had placecards which were handwritten by my sister using the embossing ink pen, gold embossing powder and the poor abused toaster. We also put a stack of blue and cream cards with a set of glitter gel pens at each table, which though I’m not sure it ever got explained by someone in charge everyone caught on and we have some great mementos from the day. This was what we settled on instead of a guestbook and it also served the purpose of filling in time (if there was time that required filling). The napkins were a really quick thing to do to turn basic blue paper napkins into something special. All I did was use a cheap rubber stamp and some gold stamping ink – no toaster involved! I should mention that these were in addition to the white linen napkins provided to the guests, and the catering staff placed them inside the champagne flutes which worked quite well.
20080208130449.jpg20080208130042.jpg20080208130750.jpg

Thank Yous

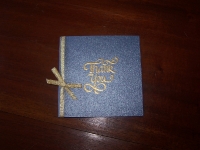
These happened quite a while after the wedding, but I at least had them all planned out in advance. I made an odd shaped card for these and to be honest, I don’t know what I was thinking! The toaster was put back to use as the blue card cover is a Thankyou stamped using invisible embossing ink and gold embossing powder. Once again a slightly trimmed creamy paper was the innards held together using the glue trick and ribbon. The envelopes were custom made in the same style as the invite envelope and using the cream paper held together using glue and a seal. I know that one of these fell apart in transit but the staff who looked after it managed to keep it together and have it arrive at the destination which was wonderful! Not shown is a small square of paper we included with details of how to visit a gallery of all the photos available of the wedding. We left the inside blank and I suspect the size of the card had a lot to do with not having to write as much!
20080208130717.jpg20080208130738.jpg

We got the printing onto card done at the local printshop where we purchased the paper, card, envelopes and seals, and the rest was done on our b&w laser. The total for everything mentioned above starting from scratch was around $450 (and I ended up with some stamping stuff out of that total). I should probably mention this was for a wedding where 70 people were invited (I think this was about 50 invites all up?).

Only a couple of things left to mention I think. I made some New Zealand Beeswax Pillar candles in Natural colour for the centerpieces for each table at the reception. They were put into blue glass bowls my mum came across and she added flowers and foliage to the bowls on the day to make everything come together better. They looked great but I don’t have any decent photos of them.
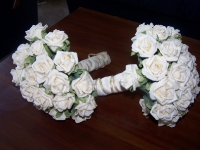
These are the bouquets the Maid of Honor and myself had:

20080208131135.jpg

They’re made of rubber and if they’re looking a bit tatty, a mouse has had a jolly good nibble at them (care of storing our wedding stuff in an outside shed that wasn’t vermin secure). The “handles” are made from left over material from my wedding dress and ribbon used in the stationery. They were put together the night before the wedding so if the seams are crooked, blame it on lastminuteitis!

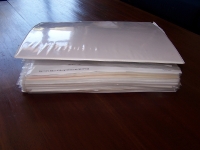
And finally – the wedding book. This was put together once we started planning the wedding and most of the bulk is the process taken to get to the final stationery and not pretty pictures of hairdo’s and frocks! There’s also stuff like the menus we got quotes for, checklists, reception and wedding venues, checklists, addresses, checklists, suit hire stuff etc etc
20080208132434.jpg

Something else I’ve forgotten to mention mainly because I don’t have any photos with them in, is the favours. I got my slaves to help me make 5 chocolates per person invited which were wrapped in blue netting and tied with the ribbon seen everywhere throughout this post. They went like hotcakes and I’m not sure everyone realised they were handmade. One had a white chocolate stripe on the top, One was dark chocolate and quite boxy shaped, there were two hearts, one had a strawberry center and the other didn’t and I think they might have been done with one in dark chocolate and the other in milk but I can’t remember :). I know my sister and maid of honor were delighted when they were finally finished and I think it’s put them both of chocolate making for life!


Daily Photo – Day 38

20080207170509.jpg

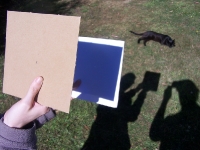
Late this afternoon/evening there was a partial solar eclipse. Sadly, all the photos which my husband took of the eclipse images on the white card came out too blurry to really publish. So this is a photo of me (or rather, my arms) using our makeshift eclipse viewer. Simply it’s a piece of cardboard with a pinhole poked in it (and literally a pinhole … there’s another hole visible in the photo which was my first attempt which I’m covering up using my finger just let sunlight through) and another piece of cardboard to project the image onto. What you would have seen projected at the zenith of the eclipse was a crescent shape.


Daily Photo – Day 37

20080206121556.jpg

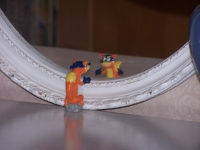
My daughter was quite fascinated by this placement of Swiper and has put him back there a number of times.


Daily Photo – Day 35

20080204152228.jpg
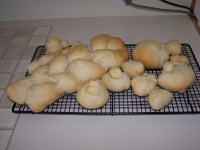
My daughter and I make buns regular but this was the first time I tried a plait – and the first time my daughter helped with the forming of the dough (normally she nibbles at it). You can tell her handiwork as she added a small dollop of dough to the top of each bun she made.


Daily Photo – Day 34

20080203105045.jpg

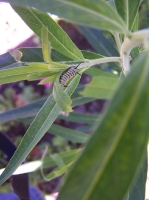
Methinks we have a few too many caterpillars – despite my efforts to cull eggs. Have monarch butterflies always laid one egg at a time?


Daily Photo – Day 33

20080202092315.jpg

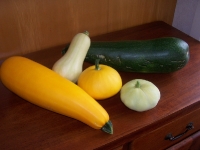
Produce from our garden

20080202134038.jpg

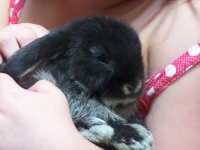
Friend’s daughter getting to cuddle a bunny at the petshop


Daily Photo – Day 30

20080130113812.jpg
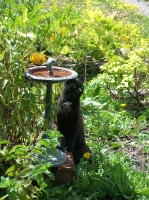
I ran inside to grab my camera when I saw Tigger on his hind legs drinking from the bird bath – so of course I only got this photo of him pretending it couldn’t possibly have been him I saw.


Daily Photo – Day 29

20080129150625.jpg